Wednesday, March 30, 2011

Sourdough Odyssey

I've been on a bit of a bread roll (HA! sorry, that was cheap.) as of late, mainly inspired by a book that was given to me, The Bread Baker's Apprentice.  It's a pretty spectacularly comprehensive book, for anyone out there who's looking to start baking bread at home.  It can, however, at times be a bit too comprehensive, to the point of exhausting.  Which is why I turn, as I often do, back to the blogosphere (to the detriment of the printed word, unfortunately).  Web content is just so accessible and amorphous in a way that can be beneficial to the cook with a curious, rambling mind.

But let's stay on topic here: I'm making bread!  And it's such fun!  My most recent favorite blog for these endeavors has been Wild Yeast.  And for supplies and further recipe research, the King Arthur Flour website is indispensable. 

At first I aspired to make sourdough bread using only wild leavening - meaning, instead of prepackaged yeast, I would use a starter built up from just flour and water, left to ferment and "bloom" over a series of days and weeks.  I'm proud to say that I've built a rather ripe and potent starter over the past few weeks, and encourage you to do so as well.  How does one do that, you may ask?  The short answer is: mix 1 part flour to 1 part filtered water in a wide-mouth jar, let it sit out at room temp until bubbles form, and BLAM-O, you've got a starter.  The long answer can be found here.

Here's a glimpse at what a maturing starter looks like:
 

Funky, huh?

After the first frustrating attempts to make a delicious, springy sandwich loaf using my starter, I had a Eureka! moment and realized that a combination of wild and commercial yeast would serve me best.  Luckily, I found a fabulous recipe that fit the bill on the King Arthur Flour site, which is my new go-to when I need to satisfy my Daily Sandwich Requirement (DSR).  I made a few changes to the original recipe, but the gist remains the same.


Multigrain Sourdough Loaf  printable version
Adapted from the King Arthur Flour Multi-Grain Sourdough
(makes 1 large sandwich loaf)

1.5 cups boiling water
1 cup grain/seed blend (ex.: rolled oats, millet, quinoa, sunflower seeds, sesame seeds, poppy seeds, etc.)
2 cups sourdough starter, recently fed and ready to use (read: bubbly and happy)
2 cups KA whole wheat white flour
1.5 cups unbleached all-purpose flour
2.5 teaspoons salt
1.5 teaspoons instant yeast
2 tablespoons vegetable oil
Sesame seeds (or any other type of seed) for garnish (optional)
In a large mixing bowl, combine the grain/seed mixture and boiling water.  Let it cool to lukewarm.

Add the remaining ingredients and mix and knead - either by hand or with a mixer or food processor - until you have a soft, tacky but not sticky, dough.  Add additional flour or water as needed to get the right texture.
Cover the dough in the same bowl and let it rise until it's almost doubled, about 1 to 1.5 hours.
Turn the dough out onto a lightly greased surface and gently fold a few times to deflate.  Shape into a large round.  Place the dough into a large ovenproof enamel pot (I used my Le Creuset) that's been sprayed with non-stick baking spray and dusted with sesame seeds or cornmeal, and cover.  Alternately, you can place the dough on a sprayed sheet pan and cover with plastic wrap.  Let the loaf rise until it's puffy, another 1 to 1.5 hours.  When the dough is almost risen, preheat the oven to 450°F. 
Just before baking, brush with water  and sprinkle with the seeds (optional).  Use a sharp knife to score the top of the loaf in a crosshatch pattern.
Place the bread in the oven, lower to 425°F, and bake for 30 minutes covered (if using the pot) and another 15 minutes uncovered, until the loaf is golden brown and an instant-read thermometer inserted into the center reads 190°F.
Remove the bread from the oven and let it cool 5 minutes.  Then turn it out of the baking vessel and cool on a rack.

* Note: If your dough isn't rising nicely and it's making you really sad, don't dismay, just improvise!  I turned some wussy looking dough into nice little seeded flatbreads, see?  Just remember, your first loaf won't be your best loaf - and may not even be a loaf at all!

Wednesday, March 23, 2011

Lunchtime Fiesta

Today I awoke from a dream of Spring to a grey, rainy/snowy world.  Blegh!  So I'm bringing a little spicy fiesta into our lives. Oh sí!

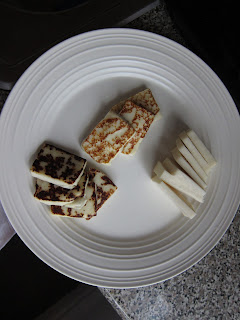
I'm making Pollo a la Mexicana (chicken breasts with onion, tomato, and jalapeño) with some fried Mexican cheese (queso!).  

Start by slicing a large Spanish onion and cooking it over medium heat with some olive oil and salt in a large skillet.  While the onion sweats, mince 2 garlic cloves, and slice 3 jalapeños and 3 medium tomatoes.

 Once the onion is soft and translucent, add the garlic and cook 2 minutes.  Then add the tomatoes and jalapeños, a dash of cumin, a pinch more salt, stir, and cook over medium heat for 10 minutes.

While you're waiting for the vegetables to cook, quarter and slice a block of Mexican white cheese ("queso para freir") and cut a lemon into wedges.

Add 2 boneless, skinless chicken breasts to the pan, sprinkle with a pinch more salt, and cover.

Cook over medium-low heat for 15-20 minutes, until the chicken is tender and cooked through.

When the chicken is almost finished, preheat a small nonstick skillet over high heat.  Once hot, fry the cheese slices in small batches of four pieces, about 1 minute on each side.  If the pan gets too hot and the cheese starts to burn, lower the heat a bit.  Remove to a plate and cover to keep warm.

Serve the chicken with the sauce spooned over, with the fried cheese and some lemon wedges.  Avocado makes a nice addition as well!
Buen provecho!

Friday, March 18, 2011

Fastest, bestest flank steak

Despite what some might think about my mother, she does in fact cook, and cook well, when the occasion calls for it.  Like, for instance, when she was raising two hungry tween twins under one roof.  I recall there being a brief period, around the age of 13, when I passed my brother in height, and we together ate enough in one meal sitting to feed a family of 8.  Ah, those were the days.

My favorite hunger-curing (and, as it turns out, super-easy) dish that my mom prepared was flank steak, done to rosy perfection on the grill, then sliced across the grain and served with all that yummy, salty juice.  There are approximately a gazillion different ways you can marinate flank steak, but here's a way to prepare it that takes minimal time and effort, for which you are rewarded magnificently in satiety. 

Grilled or Broiled Flank Steak with Chimichurri (printable version)

(serves 3-4, unless anyone in the party happens to be a ravenous young adult)

Note: When checking your steak for doneness, be sure you allow for some carry-over cooking to happen after you remove the steak from the heat.  You could end up taking it off at perfectly rare and cutting into it at medium (*sad face*).

1 flank steak, about 1.5 pounds
salt and pepper

1 cup parsley leaves
1 medium shallot, quartered
3 garlic cloves, peeled
1 teaspoon red chili flakes
1/4 cup red wine vinegar
1/2 cup olive oil

Preheat your grill or broiler and make it very hot.  Generously shower salt all over both sides of the steak, and season with pepper too.  Grill or broil the steak for 3 to 4 minutes per side, until nicely browned.  Move the steak to a cooler part of the grill, or lower the broiling rack, and cook for another 2 minutes per side.  Check for doneness by making a small cut in the middle or using an instant-read thermometer - it should read 125°F for rare.  Remove to a large cutting board.

While you let the meat rest for 5 minutes, combine all the remaining ingredients in the bowl of a small food processor (or use a mortar and pestle, if you're feeling particularly hardcore) and combine into a rough paste.  Transfer to a bowl and season to taste with salt and pepper.

Slice the flank steak across the grain and serve with the chimichurri sauce.

(Please excuse the absence of photos - it was late, we were starving, and thus we inhaled the fruits of our labor before convening to document the evidence.)